Bad glass railing parts don’t fail loudly at first—they fail quietly. A loose glass clamp can scratch the glass, shift the panel, and turn a simple install into a costly site problem. I’ve seen it happen. The fix is choosing the right clamp, testing samples, and locking the spec.
What is a glass railing clamp, and how do you choose one? Pick a glass clamp that matches your glass panels thickness, mounting method, and environment (especially corrosion risk). Confirm material grade (often 316 for harsh climates), check fit with real glass samples, and standardize QC and packaging for repeat orders.
Article outline
- What does a glass clamp do in a glass railing and why does spec matter?
- Square vs round: how do you match square glass to thickness and load?
- Stainless steel grades: when should you choose 316 to fight corrosion?
- Mounting methods: face mount vs top mount and what “mount” really means
- Corners and transitions: how does glass to glass connection work?
- Installation: what should contractors check before they install?
- Finish choices: brush vs polish, and how design teams avoid mismatch
- Price planning: what drives price and lead time for global projects?
- QC for repeat supply: safety checks, durability targets, and warranty expectations
- OEM and custom production: how to go from drawings to reliable bulk supply
What does a glass clamp do in a glass railing and why does spec matter?
A glass clamp is a small part with a big job: it grips glass and keeps the railing line clean and stable. On paper it looks simple. On site, it must stay tight, resist weather, and protect the glass edge. That’s why I treat it as a safety-critical fitting, not a “decor piece.”
Here’s a key point I tell distributors and contractors: you don’t buy “a clamp,” you buy a controlled interface between metal and glass. If the tolerance is wrong, the glass chips. If the gasket is wrong, the glass slides. If the finish is wrong, the panel looks mismatched under daylight.
In our OEM work for global markets, we build the spec around the real application—balconies, stairs, pools, and partitions—then we lock the drawing, sample, and QC checkpoints. That workflow protects your brand and reduces field complaints.

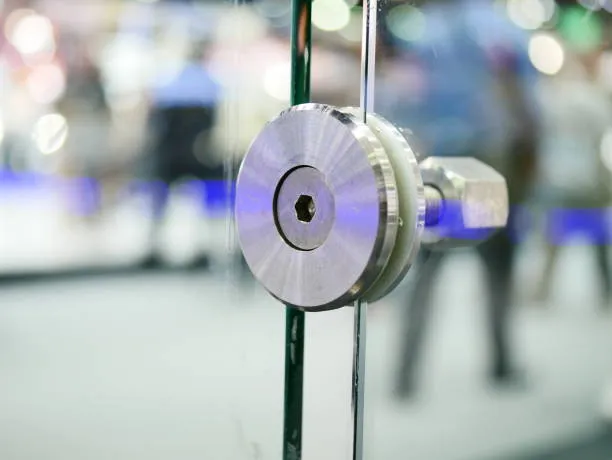
glass clamp
Square vs round: how do you match square glass to thickness and load?
Most buyers ask me first about shape: square or round? Shape is partly style, but mostly contact geometry. A square glass clamp usually gives a more modern line and can create a stronger visual “edge” that pairs well with straight posts and modern architecture.
What matters more is matching the clamp cavity to the real thickness range of the glass panels you plan to use. Tempered or laminated options vary by project and region. EN 12150 (a common European safety standard) focuses on thermally toughened safety glass requirements like fragmentation and characteristics.
A practical selection table I use in proposals:
| Project need |
What to specify |
Why it reduces risk |
| Clean modern line |
square clamp body |
easier to align visually |
| Better edge protection |
thicker liners + controlled cavity |
reduces point stress |
| Faster site work |
consistent cavity tolerance |
fewer reworks |
| Stronger grip feel |
deeper contact surfaces |
better stability under vibration |
If your project has long spans, wind exposure, or high traffic, the best approach is: sample + load expectation + inspection rule. That’s how you avoid “looks good in the catalog, not good on site.”
Stainless steel grades: when should you choose 316 to fight corrosion?
In many regions, buyers default to stainless steel because it looks clean and lasts longer than plated carbon steel. That’s a good start. But the grade choice is where pros win: 316 is widely recognized for better resistance to pitting and crevice corrosion in chloride environments compared with 304, thanks to its molybdenum content.
If you sell to coastal cities, islands, or high-humidity climates, grade selection becomes a brand protection decision. In our experience, choosing the wrong grade creates “mystery stains” that customers blame on the supplier, even when the structure is fine.
Here’s the simple rule I share with door-and-window manufacturers and contractors: choose the grade based on environment, not on appearance. For exposed balconies, pool sides, and seaside villas, plan for aggressive conditions. If you want long-term performance, specify high-quality stainless steel and define inspection points for surface defects and passivation quality.
I’ll say it directly: if you expect salt air, plan for 316 early. It’s easier than explaining later why replacement parts are needed.

how does glass to glass connection work
Mounting methods: face mount vs top mount and what “mount” really means
People often say “we need a clamp that can mount on posts.” I always ask: where exactly is the load path going? A clamp can mount to posts, to a side plate, or to a top cap. The right choice depends on the railing layout, the substrate, and the job’s tolerance for alignment.
Common setups include:
- Post-mounted clamp: clean and modular, great for standard lines
- Side plate clamp: useful when posts are behind the line of glass
- Top rail support: works when a top rail shares the load path
And yes, the bracket design matters. It affects how installers adjust alignment and how the clamp “sits” after tightening. In factory sampling, we check two things: alignment ease and gasket compression behavior.
In our OEM process, we also confirm the interface with the overall railing system so everything fits without on-site grinding. That saves time, reduces returns, and keeps your delivery schedule stable.
Corners and transitions: how does glass to glass connection work?
Corners are where projects get tricky. A straight run is simple. A corner must handle directional forces and keep the glass edge safe. Many projects use a connector style that supports glass to glass joints, especially for frameless corners or interior partitions.
If you build corner details, you must confirm the angle requirement—sometimes you need degree glass corner solutions (like 90-degree assemblies), and sometimes you need adjustable connectors for off-angle architecture. This is also where “fit-up” tolerance matters: a few millimeters can change everything.
One line I use in spec sheets—because it’s true and easy to verify—is that our parts are designed to securely hold glass panels. That sentence forces clarity: which thickness, which gasket, which torque, which inspection rule. When buyers adopt that mindset, projects go smoother and claims drop.
For specialty layouts, some buyers want a glass holder concept that supports panels without visible posts. That can look sleek and support an unobstructed view, but it also demands tighter engineering and stricter installation control.
how does glass to glass connection work
Installation: what should contractors check before they install?
I like fast installs. But I like safe installs more. Before you start, confirm the glass type, the liner fit, the post spacing, and the alignment plan. If the panel line is off, installers will over-tighten to “force it,” and that’s where stress begins.
A short pre-install checklist that prevents most site issues:
- Verify glass thickness with a caliper on real samples
- Dry-fit one panel to confirm cavity tolerance
- Confirm the gasket fully covers glass edges
- Confirm the clamp can fix alignment without forcing the panel
- Tighten evenly and re-check alignment after first pass
One thing many teams forget: a single screw can feel tight while the liner is still not seated correctly. That leads to micro-movement, noise, and surface marks later. If your distributor supports installers, include a simple “fit and tighten” guide with the shipment.
When contractors ask me about installation, I keep it plain: steady steps, no guessing, and document the first unit. That’s how you scale from one house to a full project.
Finish choices: brush vs polish, and how design teams avoid mismatch
Finish is where design and quality control meet. In global orders, mismatch is a common complaint because light changes everything. A brushed surface may look soft indoors, but harsh outdoors. A mirror-like finish can highlight fingerprints fast.
Two finishing directions dominate in real projects:
- brush finish: hides small marks, looks modern, easy to match
- polish finish: brighter, more reflective, can feel premium but shows defects
We usually recommend sample approval under two lighting conditions: natural daylight and the site’s main interior lighting. This reduces “surprise mismatch” during handover.
If you want a softer, modern look for luxury projects, you may specify satin surfaces. That can look more architectural and less “shiny,” especially around dark frames.
A small but important note: if the customer also wants more privacy, they may choose frosted or tinted glass. That changes how the metal tone is perceived. So finish and glass selection should be reviewed together.
Price planning: what drives price and lead time for global projects?
Buyers often ask me one question: “What’s the price?” The honest answer is: the price depends on spec stability. When drawings change, packaging changes, and finish changes, the price becomes unpredictable.
Main price drivers I see in real orders:
- material grade (like 304 vs 316)
- body mass and machining complexity
- finish steps and defect acceptance limits
- gasket and liner material quality
- packing method and labeling requirements
- testing requirements and documentation
A simple “cost ladder” view (not exact numbers—just what pushes cost up):
- Base clamp body: ███
- Better finish control: █████
- 316 + stricter QC: ███████
- Custom packaging + tests: █████████
Lead time is also tied to production planning and inspection flow. When we align the spec early, delivery becomes easier to promise and easier to meet. For international buyers, I always recommend locking the sample and carton label rules before mass production so delivery stays smooth.
If you’re bidding a project, ask for a stable schedule and share it early. It protects you from rush charges and reduces surprises on the invoice.
QC for repeat supply: safety checks, durability targets, and warranty expectations
For safety-critical guard systems, many projects rely on recognized standards. ASTM E2358 covers performance requirements and test methods for glass used in permanent railing systems, guards, and balustrades across building types.
And building codes drive dimensions. For example, U.S. residential guard height is commonly 36 inches under the IRC, while many commercial settings require 42 inches under IBC. One reference summarizes IRC and IBC differences clearly.
“Required guards … shall not be less than 36 inches … in height.”
What does this mean for buyers? It means your clamp is part of a bigger compliance story. Even if the clamp is not the full guard, it must support the system’s performance.
Our factory checklist focuses on repeatability: liner fit, cavity size, surface inspection, and functional tightening checks. This is where we talk about durability targets and what the warranty should cover. A good warranty is not just a promise; it’s proof that the supply chain is controlled.
One more practical point: if the project includes a steel stair run, vibration and foot traffic can be higher than on a simple balcony. That’s where tighter tolerance and better surface control pay off.
OEM and custom production: how to go from drawings to reliable bulk supply
OEM buyers want one thing: consistent output that protects their brand. That’s exactly how we work. We are a professional manufacturer of door, window, and bathroom fittings for global markets, and we support OEM and custom production with stable specs and controlled output.
Here’s the method that works:
- Confirm drawings + thickness range + finish direction
- Build sample set and approve on real glass
- Lock carton labeling and inspection rules
- Run pre-production verification and record acceptance limits
- Start mass production with batch checks and photo records
One sentence I often include in proposals—because buyers can audit it—is: glass clamp is made with stainless steel construction and controlled liners to reduce edge stress. That’s not marketing fluff; it’s a manufacturing promise tied to inspection.
For distributors and brands, I also recommend you standardize spare gaskets and fasteners in one box. That reduces site delays and improves customer satisfaction. And if your brand sells multiple types, you can create one label and pack standard to reduce warehouse errors.
Finally, if you need a long-term supplier for projects that demand clean visuals and strong performance, we can support stable repeat orders with documented QC, clear lead times, and consistent finishing—so your products stay reliable, look stylish, and carry a sense of elegance without drama.
Mini case study: reducing site issues on a mixed stair and balcony project
A contractor working on a mid-rise project had two problems: panel alignment drift and surface scratches during install. The job included both balcony lines and a stair section. The first batch “worked,” but the crew spent too much time adjusting.
We solved it by tightening the clamp cavity tolerance, improving liners, and using a consistent brushed finish control plan. We also added a quick guide so installers could install without guessing and could fix alignment before tightening. On the next phase, the contractor reported fewer complaints and faster handover.
The takeaway is simple: the best clamp choice is not the cheapest one. It’s the one that stays stable, looks consistent, and reduces labor time.
FAQs
What thickness of glass panels should a glass clamp support?
Match the clamp cavity to your real thickness range, then confirm with physical samples before mass production.
Should I choose 316 stainless steel for outdoor railing projects?
If your project is near the coast or exposed to chlorides, 316 usually offers better corrosion resistance than 304.
Do I need tempered glass for a glass railing?
Many regions and specs require safety glass, often thermally toughened (tempered) or laminated, and standards like EN 12150 describe requirements for toughened safety glass.
How can I avoid finish mismatch between batches?
Approve a physical sample, define acceptance limits, and inspect each batch under consistent lighting before packing.
What impacts price the most for bulk orders?
Material grade, finish steps, inspection standards, and packaging rules usually drive price more than the body shape alone.
How fast can you deliver for OEM projects?
Delivery depends on spec stability and sampling speed; once drawings and sample approval are locked, lead times become predictable.
Key takeaways
- Choose a glass clamp based on thickness range, mount method, and environment—not just looks.
- For harsh climates, consider 316 early to reduce corrosion risk.
- Use real samples and lock the spec before mass production to protect price and delivery.
- Control finish under consistent lighting to avoid mismatch and claims.
- Treat clamps as safety-critical components: document QC, performance context, and warranty terms.